


Transform Hallways into Stories Worth Walking Through
CHOOSE YOUR Story
Choose the titles that define your school’s story. Select from your curriculum reading list, student favorites, diverse authors, or build from our library of 150+ pre-designed book spine locker graphics. Whether you want timeless classics, modern bestsellers, or fully custom-designed locker wraps, we scale and align every spine to create a seamless, professional hallway installation.
Option 1: Choose Your Own Titles
Design a completely custom locker installation based on your curriculum reading list or student favourites. Whether it’s Shakespeare or Salinger we design the spines to reflect your unique academic voice.
Option 2: Select From Our 150+ Pre-Built Book Spine Designs
Need a faster solution? Choose from our curated library of over 150 ready-to-print book spine designs all designed to fit perfectly.
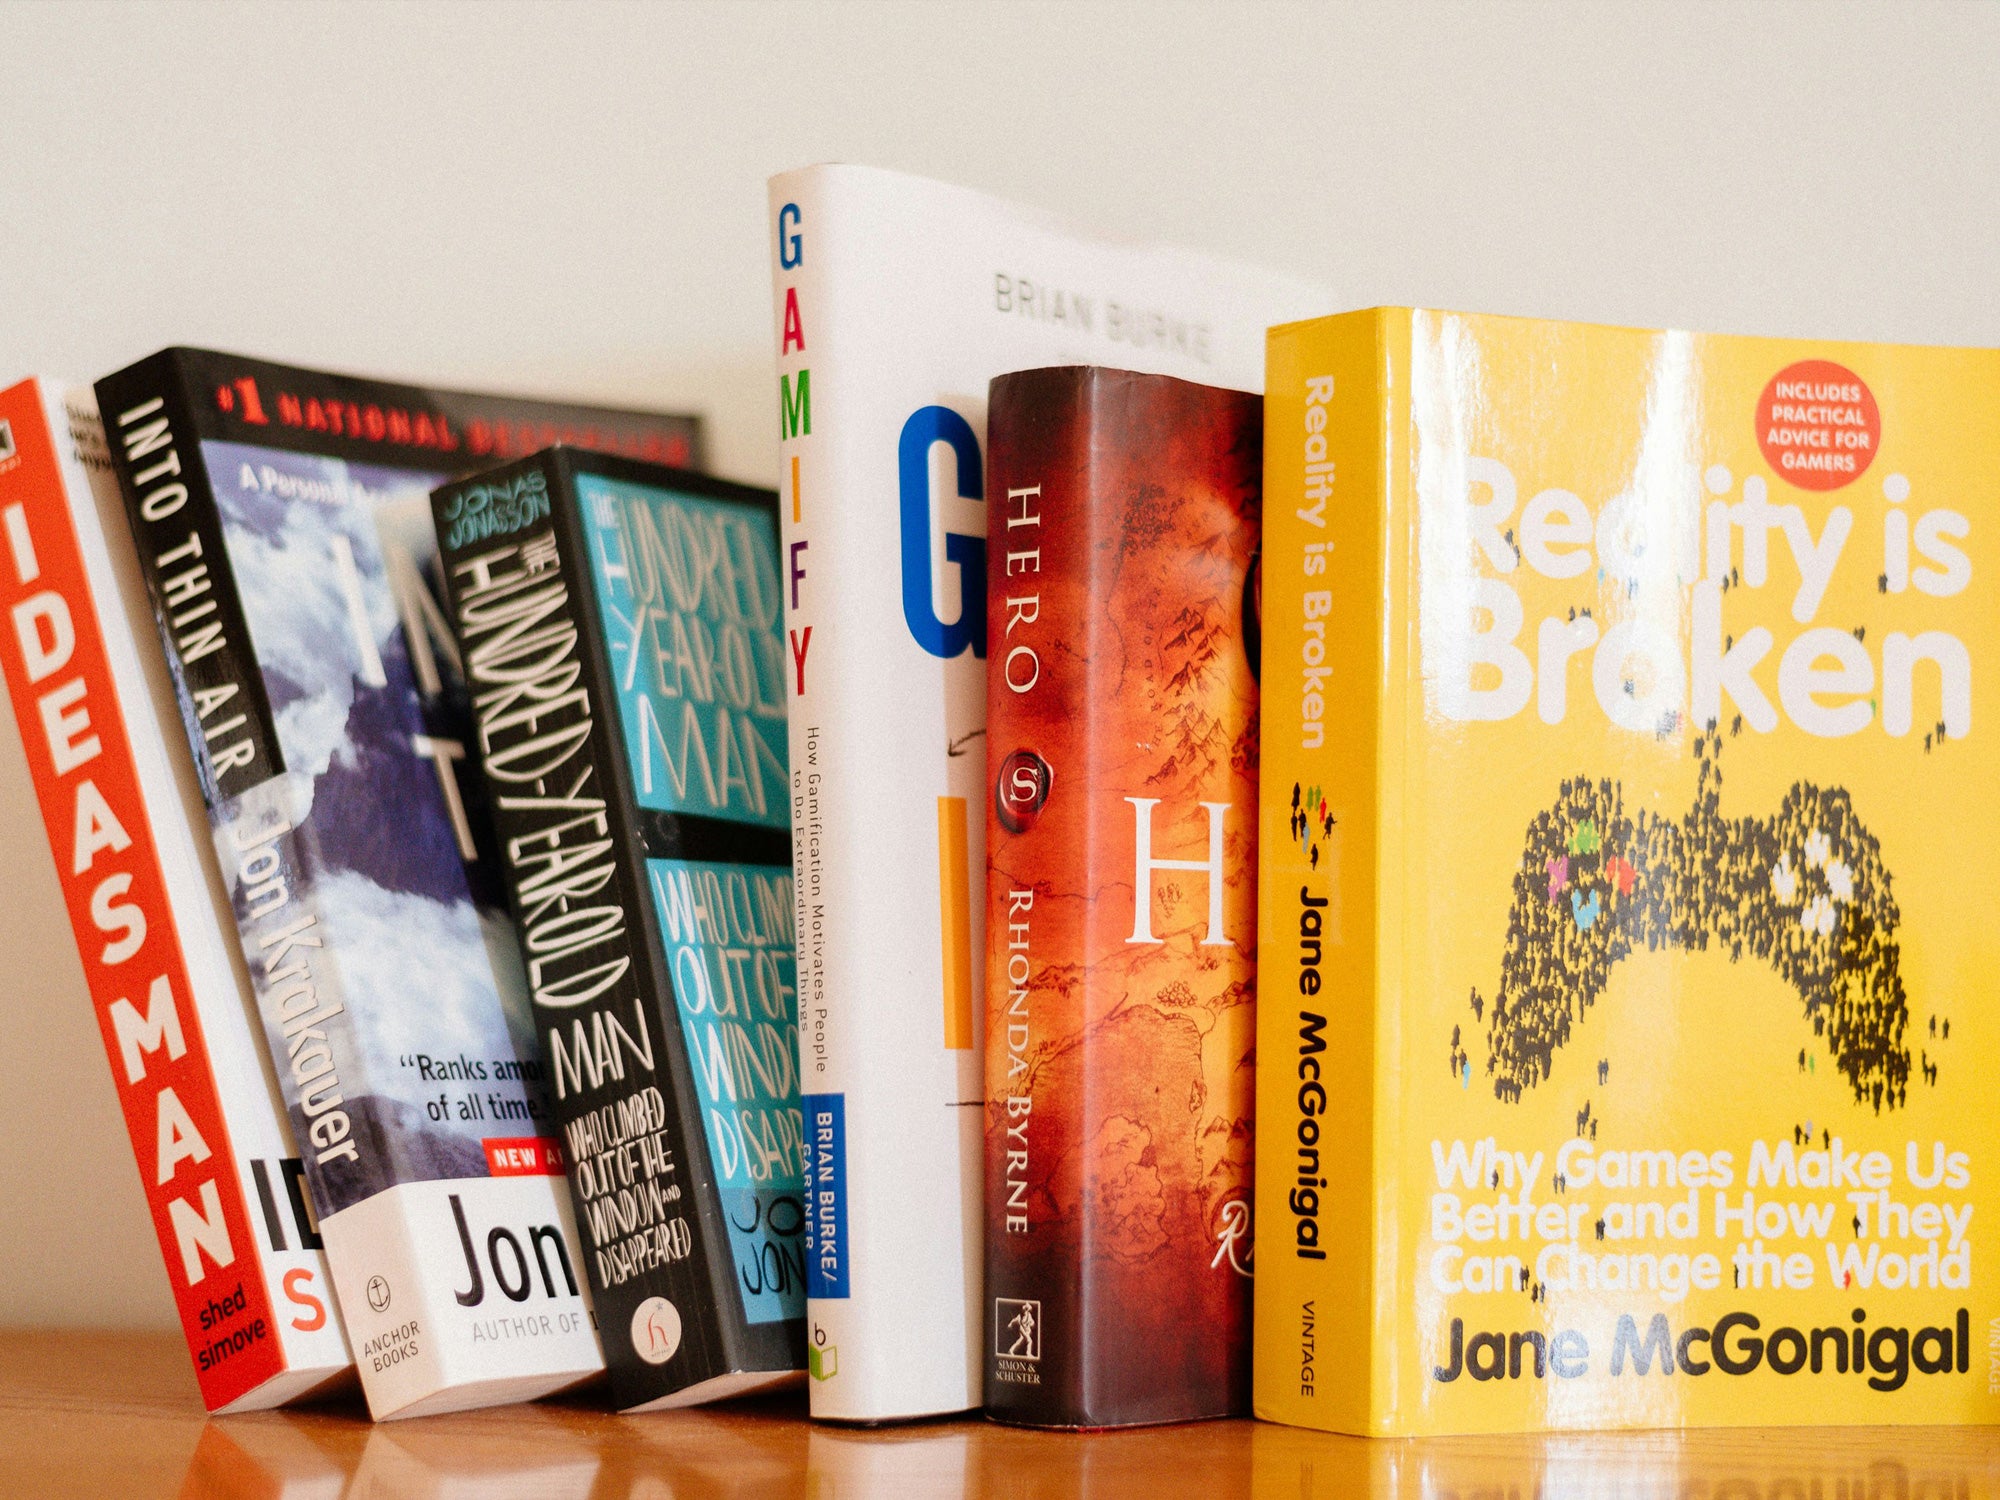
Custom Book Spine Locker Wraps for Schools
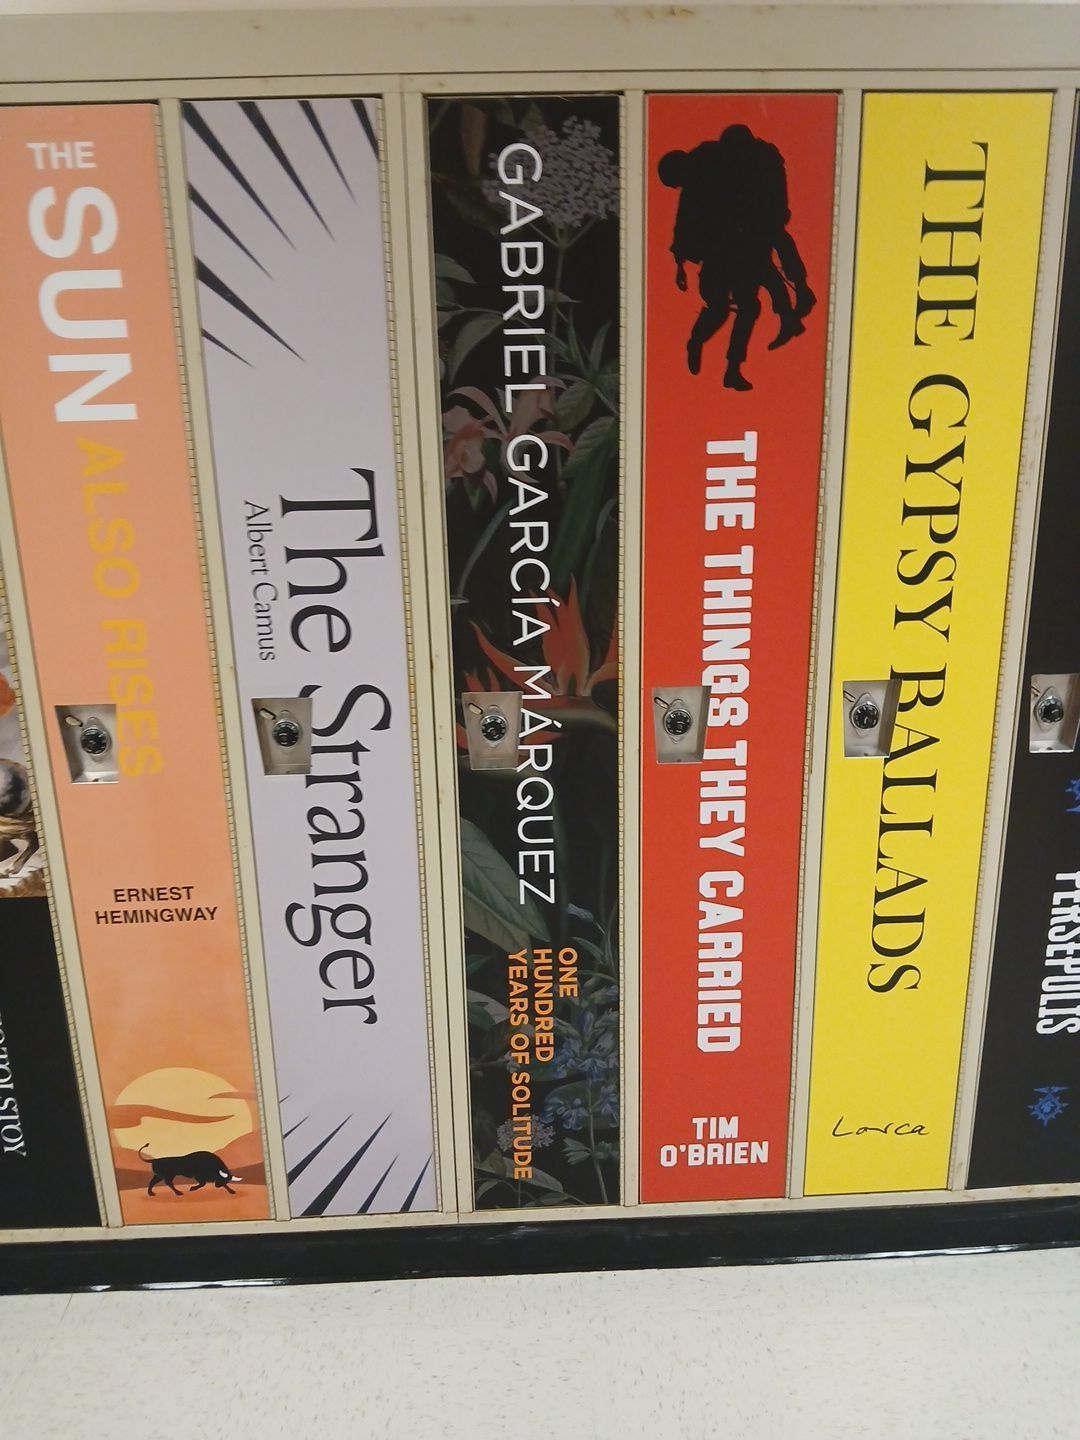
Turn ordinary school lockers into oversized literary statements with custom book spine locker wraps designed for hallways, libraries, and academic wings. These durable commercial vinyl locker graphics transform standard locker banks into seamless walls of books — promoting reading culture, school pride, and modern educational design. Perfect for middle schools, high schools, universities, and public libraries looking to elevate their hallway environment with bold, impactful locker murals.
Ready-to-Install Book Spines
Select from 300+ professionally designed book spine titles — curated for schools, libraries, and literary spaces. Simply choose your favourites and we’ll handle the rest.
1984
419
A American Marriage
A Fine Balance
A Game of Thrones
A Heartbreaking Work of Staggering Genius
A Lesson Before Dying
A Long Way Gone
A Monster Calls
A Prayer for Owen Meany
A Tree Grows in Brooklyn
Adventures of Kavalier & Clay
Alice in Wonderland
Amal Unbound
Amber Spyglass
Americanah
Angela’s Ashes
Animal Farm
Anna Karenina
Anne Frank: The Diary of a Young Girl
Anne of Green Gables
Aristotle and Dante Discover the Secrets of the Universe
Art of Racing in the Rain
Barack Obama: A Biography
Barney’s Version
Beartown
Becoming
Beloved
Benjamin Franklin: A Biography
Between the World and Me
Black Boy
Blind Spot
Blood Scion
Bloodletting and Miraculous Cures
Boat People
Book of Negroes
Born a Crime
Boy 21
Braiding Sweetgrass
Breath Becomes Air
Bridget Jones’s Diary
Bronx Masquerade
Brother
Brown Girl Dreaming
Bucking the Sarge
Caste
Caterpillars Can’t Swim
Catcher in the Rye
Change Sings
Charlotte’s Web
Children of Blood and Bone
Chronicles of Narnia
Circe
Citizen
Complicated Kindness
Copper Sun
Creeboy
Crucible
Crossover
Death of a Salesman
Dear Martin
Different Seasons
Displacement
Dress Lodger
Educated
Eleanor and Park
Eleanor Oliphant Is Completely Fine
Ender’s Game
Essex County
Everything Beautiful
Exit
Extremely Loud and Incredibly Close
Fall on Your Knees
Fahrenheit 451
Fault in Our Stars
Fear and Loathing in Las Vegas
Fifth Business
Finding Edward
Five Little Indians
Flights of Spirit
Frankenstein
Frederick Douglass: A Biography
Freak the Mighty
Frying Plantain
Funny Boy
Giovanni’s Room
Glass Castle
God of All Small Things
Graveyard Book
Great Expectations
Great Gatsby
H Is for Hawk
Half Blood Blues
Half of a Yellow Sun
Hamlet
Handmaid’s Tale
Harry Potter and the Goblet of Fire
Harry Potter and the Pilosopher’s Stone
Headmaster’s Wager
Help
Hitchhiker’s Guide to the Galaxy
Hobbit
Holes
Homegoing
House of Sand and Fog
Hunger Games
I Am Malala
I Am the Messenger
I Know This Much Is True
I Know Why the Caged Bird Sings
I’ll Give You the Sun
Indian Horse
Infinite Jest
In the Skin of a Lion
Inside Out and Back Again
Into Thin Air
Invisible Man
Jane Eyre
Jason & Kyra
Jayden’s Rescue
Kendra
King Lear
Kite Runner
Life After Life
Life of Pi
Little Bee
Lives of Girls and Women
London
Long Way Down
Lord of the Flies
Lord of the Rings
Love Medicine
Lovely Bones
Macbeth
Machinehood
Malcolm X: A Biography
Mary Coin
Martian
Maze Runner
Me Talk Pretty One Day
Milk and Honey
Monster
Motorcycles and Sweetgrass
My New Favorite Thing Is Monsters
Namesake
Native Son
Never Let Me Go
Nickel Boys
Night
Not Wanted on the Voyage
Noughts and Crosses
Of Mice and Men
Old Man and the Sea
On Beauty
On the Road
One Flew Over the Cuckoo’s Nest
Opposite of Loneliness
Oryx and Crake
Outsiders
Paperbag Princess
Paper Towns
Parts of Being a Wallflower
Persepolis
Petit Prince
Place for Us
Poet
Poisonwood Bible
Pride and Prejudice
Princess Bride
Reader
Remembering the Bones
Reluctant Fundamentalist
Road
Romeo and Juliet
Room
Roots
Rosie Effect
Rose That Grew From Concrete
Reader
Remembering the Bones
Reluctant Fundamentalist
Road
Romeo and Juliet
Room
Roots
Rosie Effect
Rose That Grew From Concrete
Saturday
Scarlet Letter
Secret History
Secret Life of Bees
Sea of Tranquility
Seven Fallen Feathers
She’s Come Undone
Shoeless
Simon vs. Te Homo Sapiens Agenda
Sing, Unburied, Sing
Sisters Brothers
Sky Is Everywhere
Slaughterhouse-Five
Someday
Speak
Station Eleven
Still Alice
Stone Diaries
Strangers
Tales of the City
Their Eyes Were Watching God
There There
They Both Die at the End
Thief
Things Fall Apart
This Boy’s Life
This Place: 150 Years Retold
To Kill a Mockingbird
Tomboy
Tyrell
Under the Whispering Door
Underground Railroad
Unwind
Van
Vanishing Half
War Brothers
Water for Elephants
We Could Be Brothers
We’ve Always Been Here
When Breath Becomes Air
When the Stars Go Blue
Where the Crawdads Sing
Wild
Wonder
Woman in White
Wuthering Heights
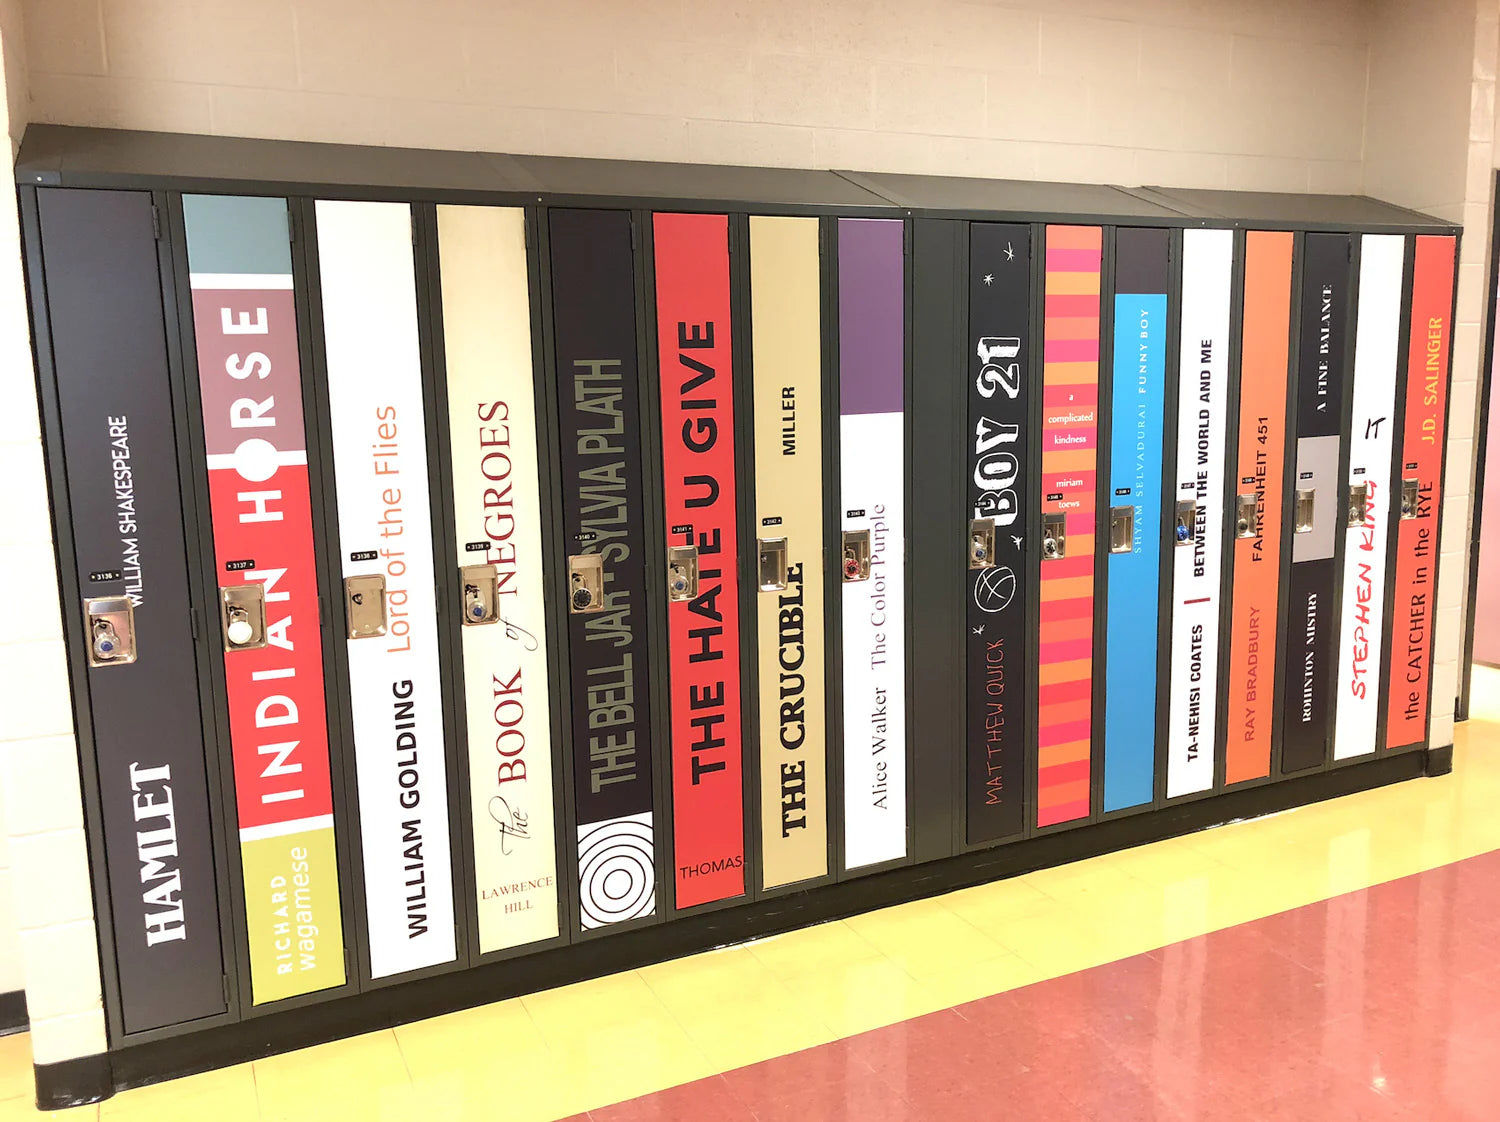
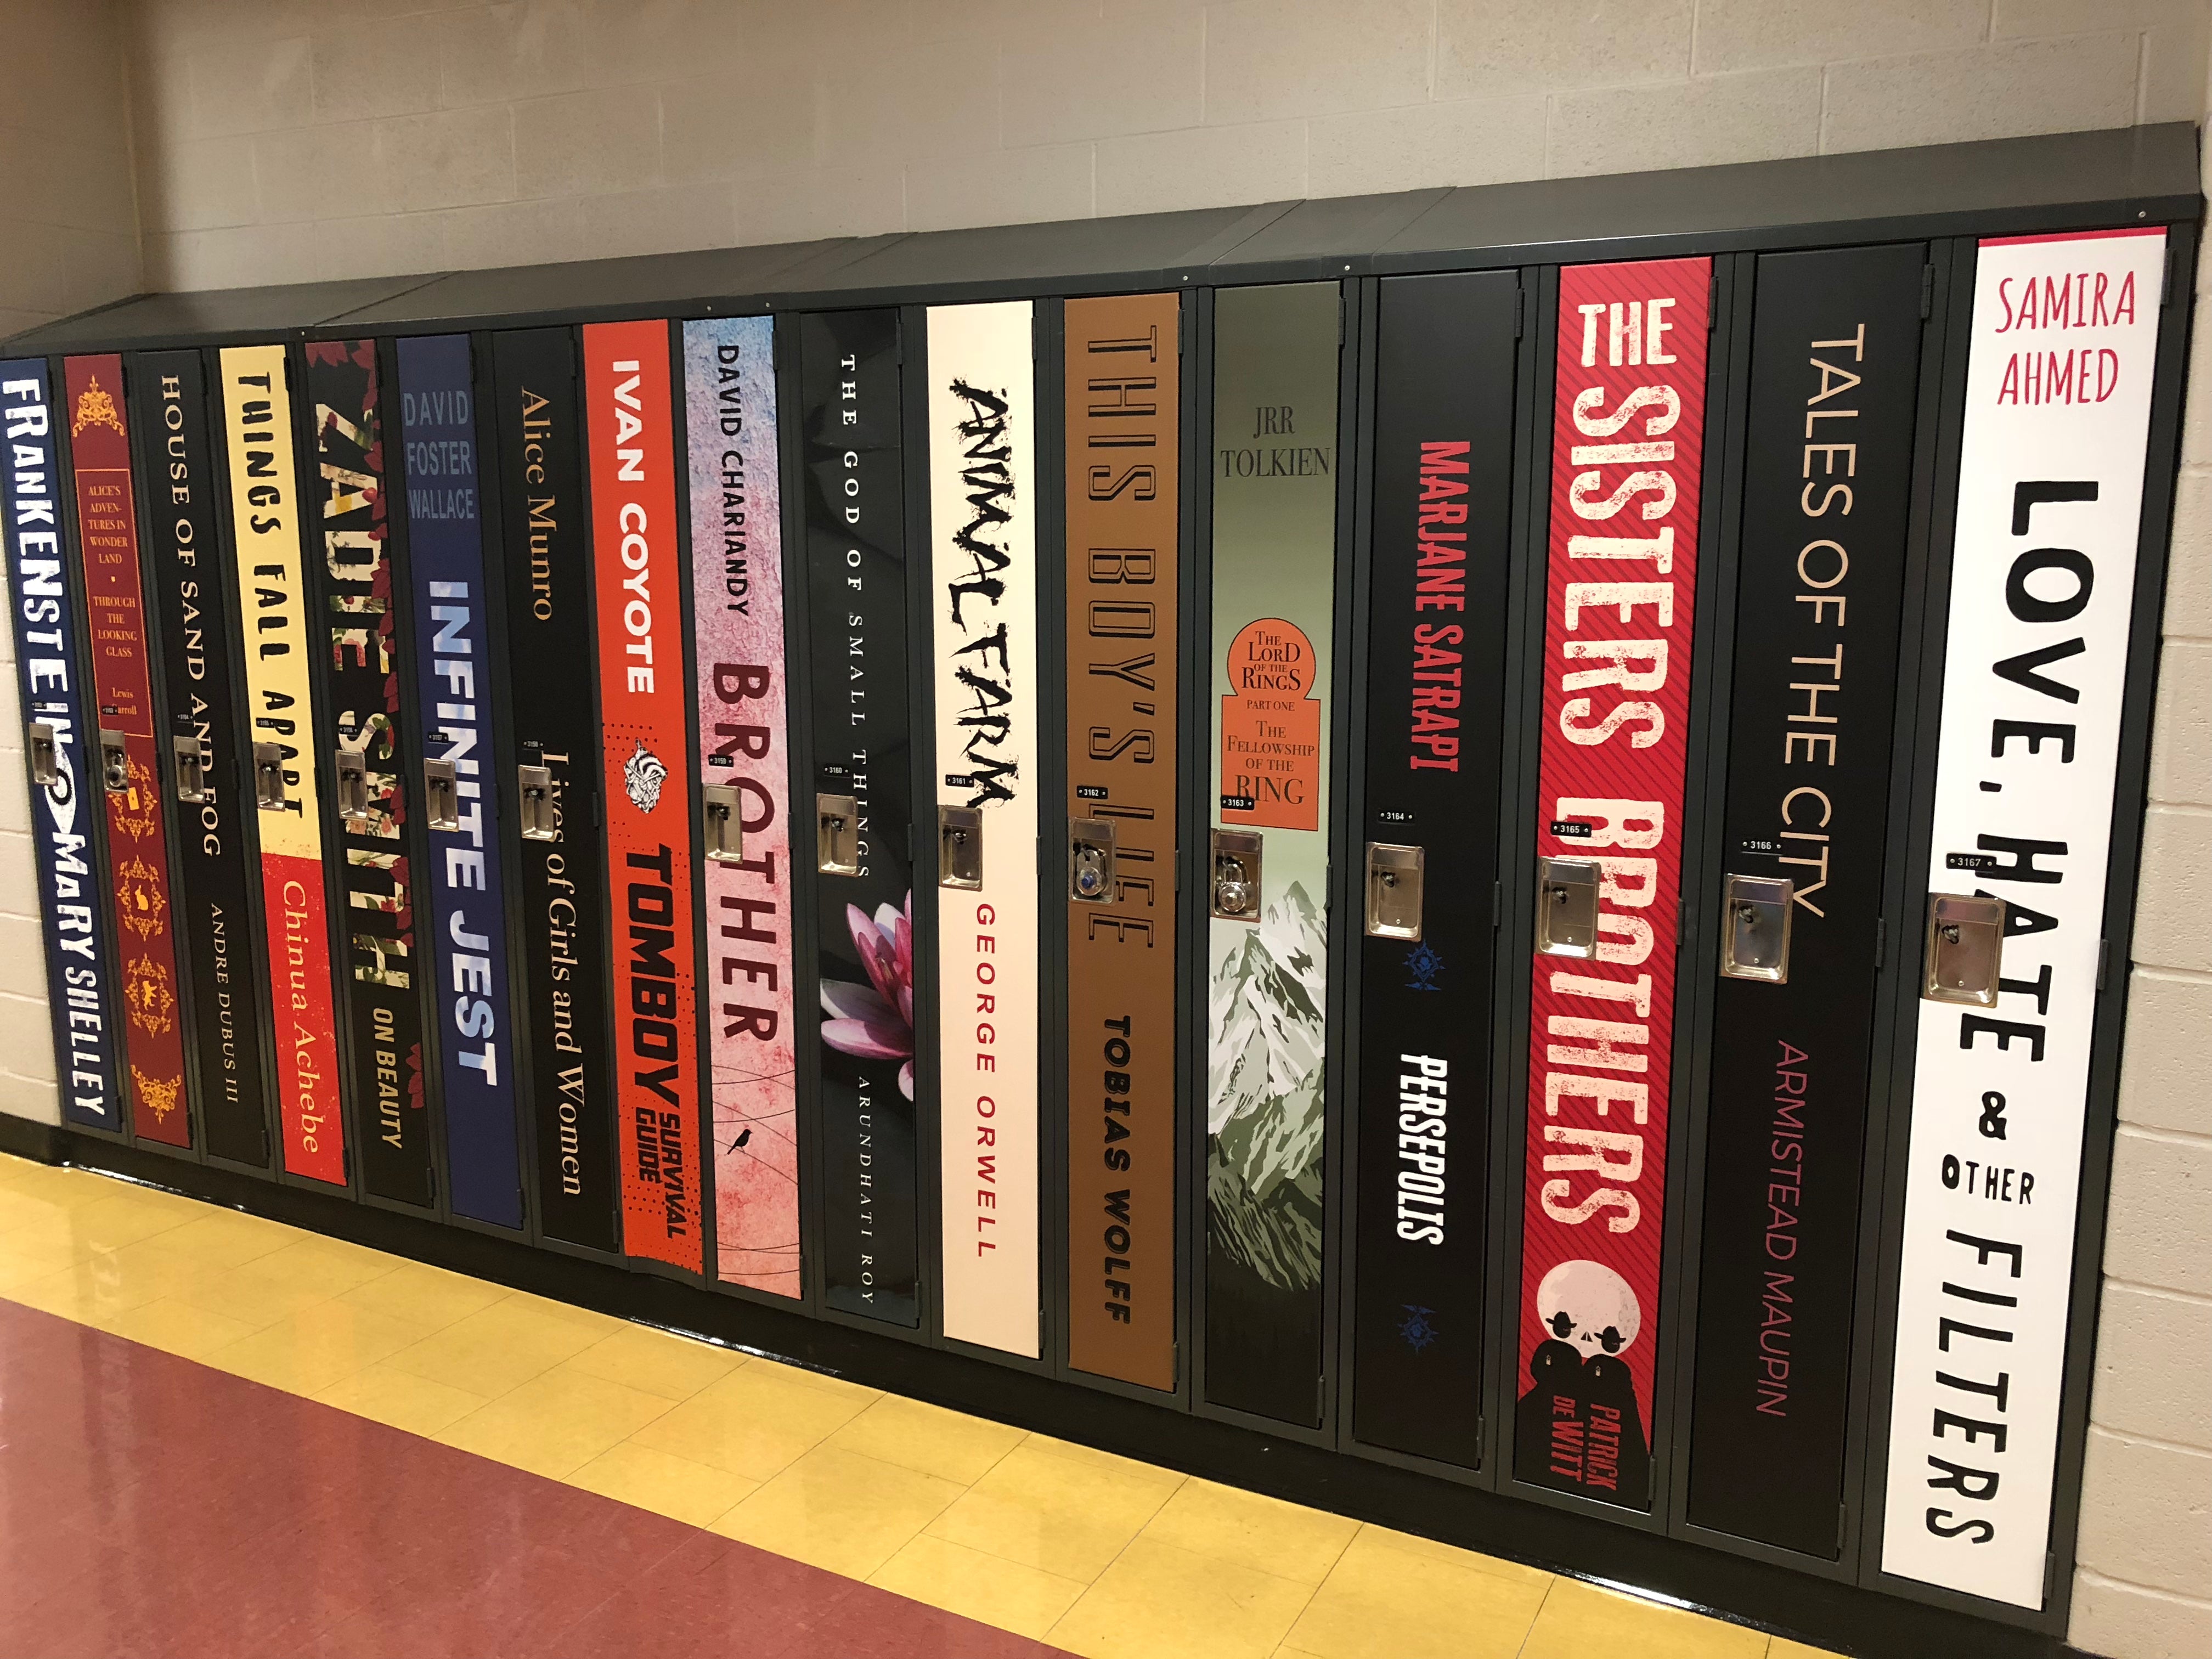
Hallways That Inspire Readers
Book spine lockers and literary murals turn ordinary hallways into inspiring learning environments. From elementary classrooms to high school corridors, our custom book spine designs celebrate curriculum titles, diverse authors, and the power of reading — creating spaces students connect with every day.
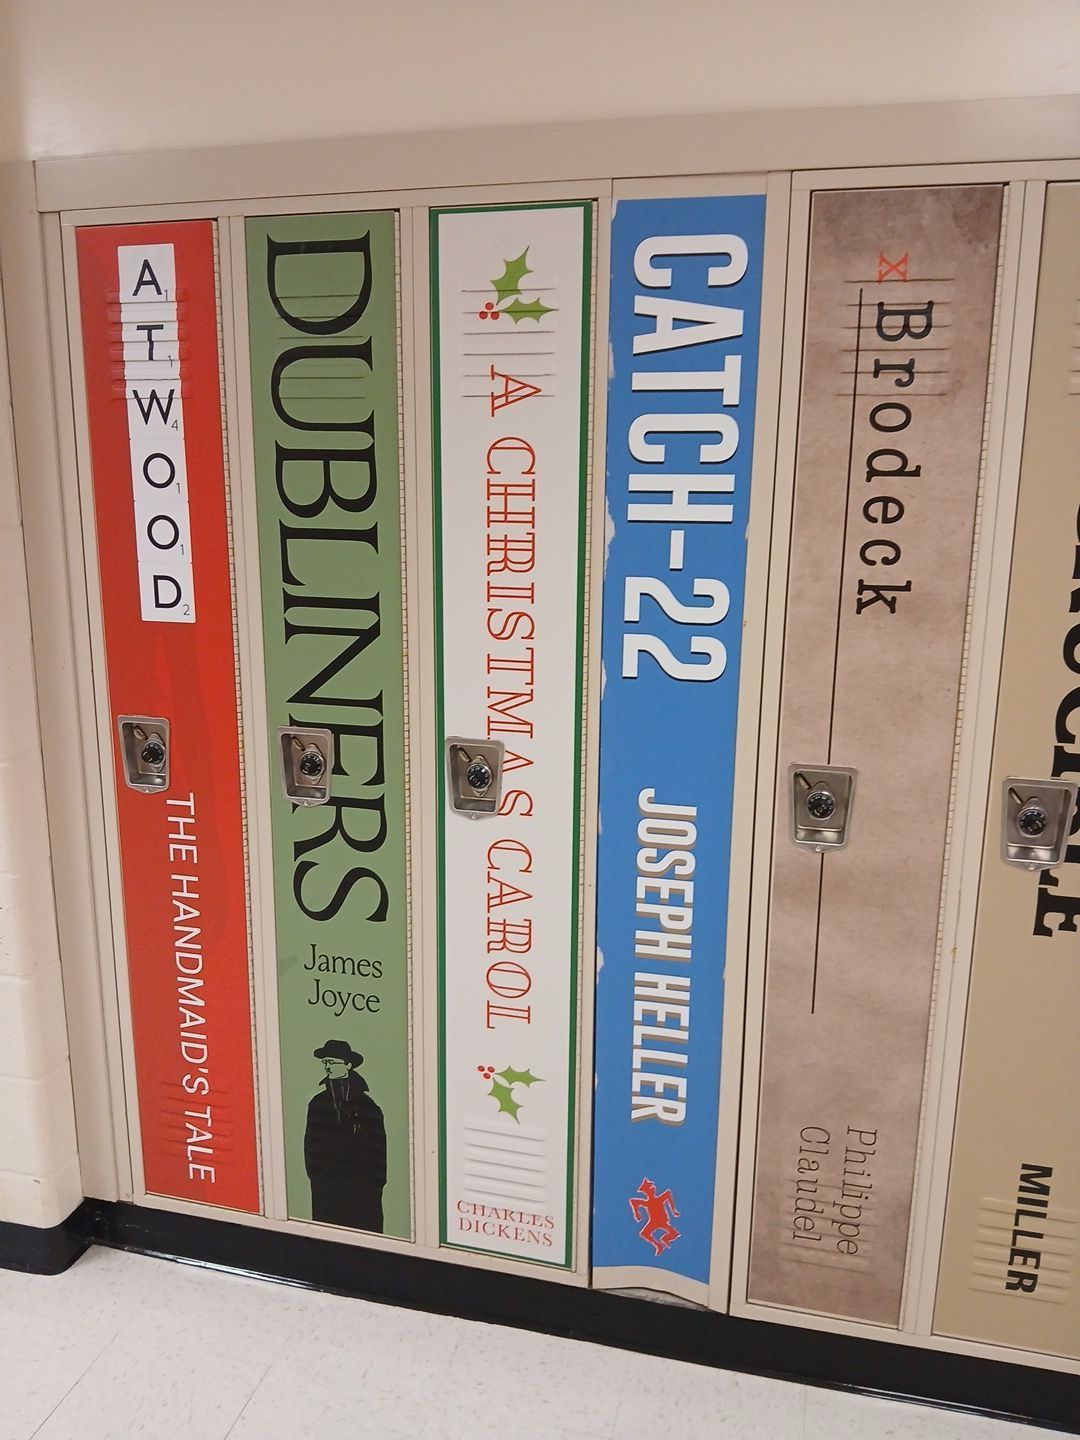

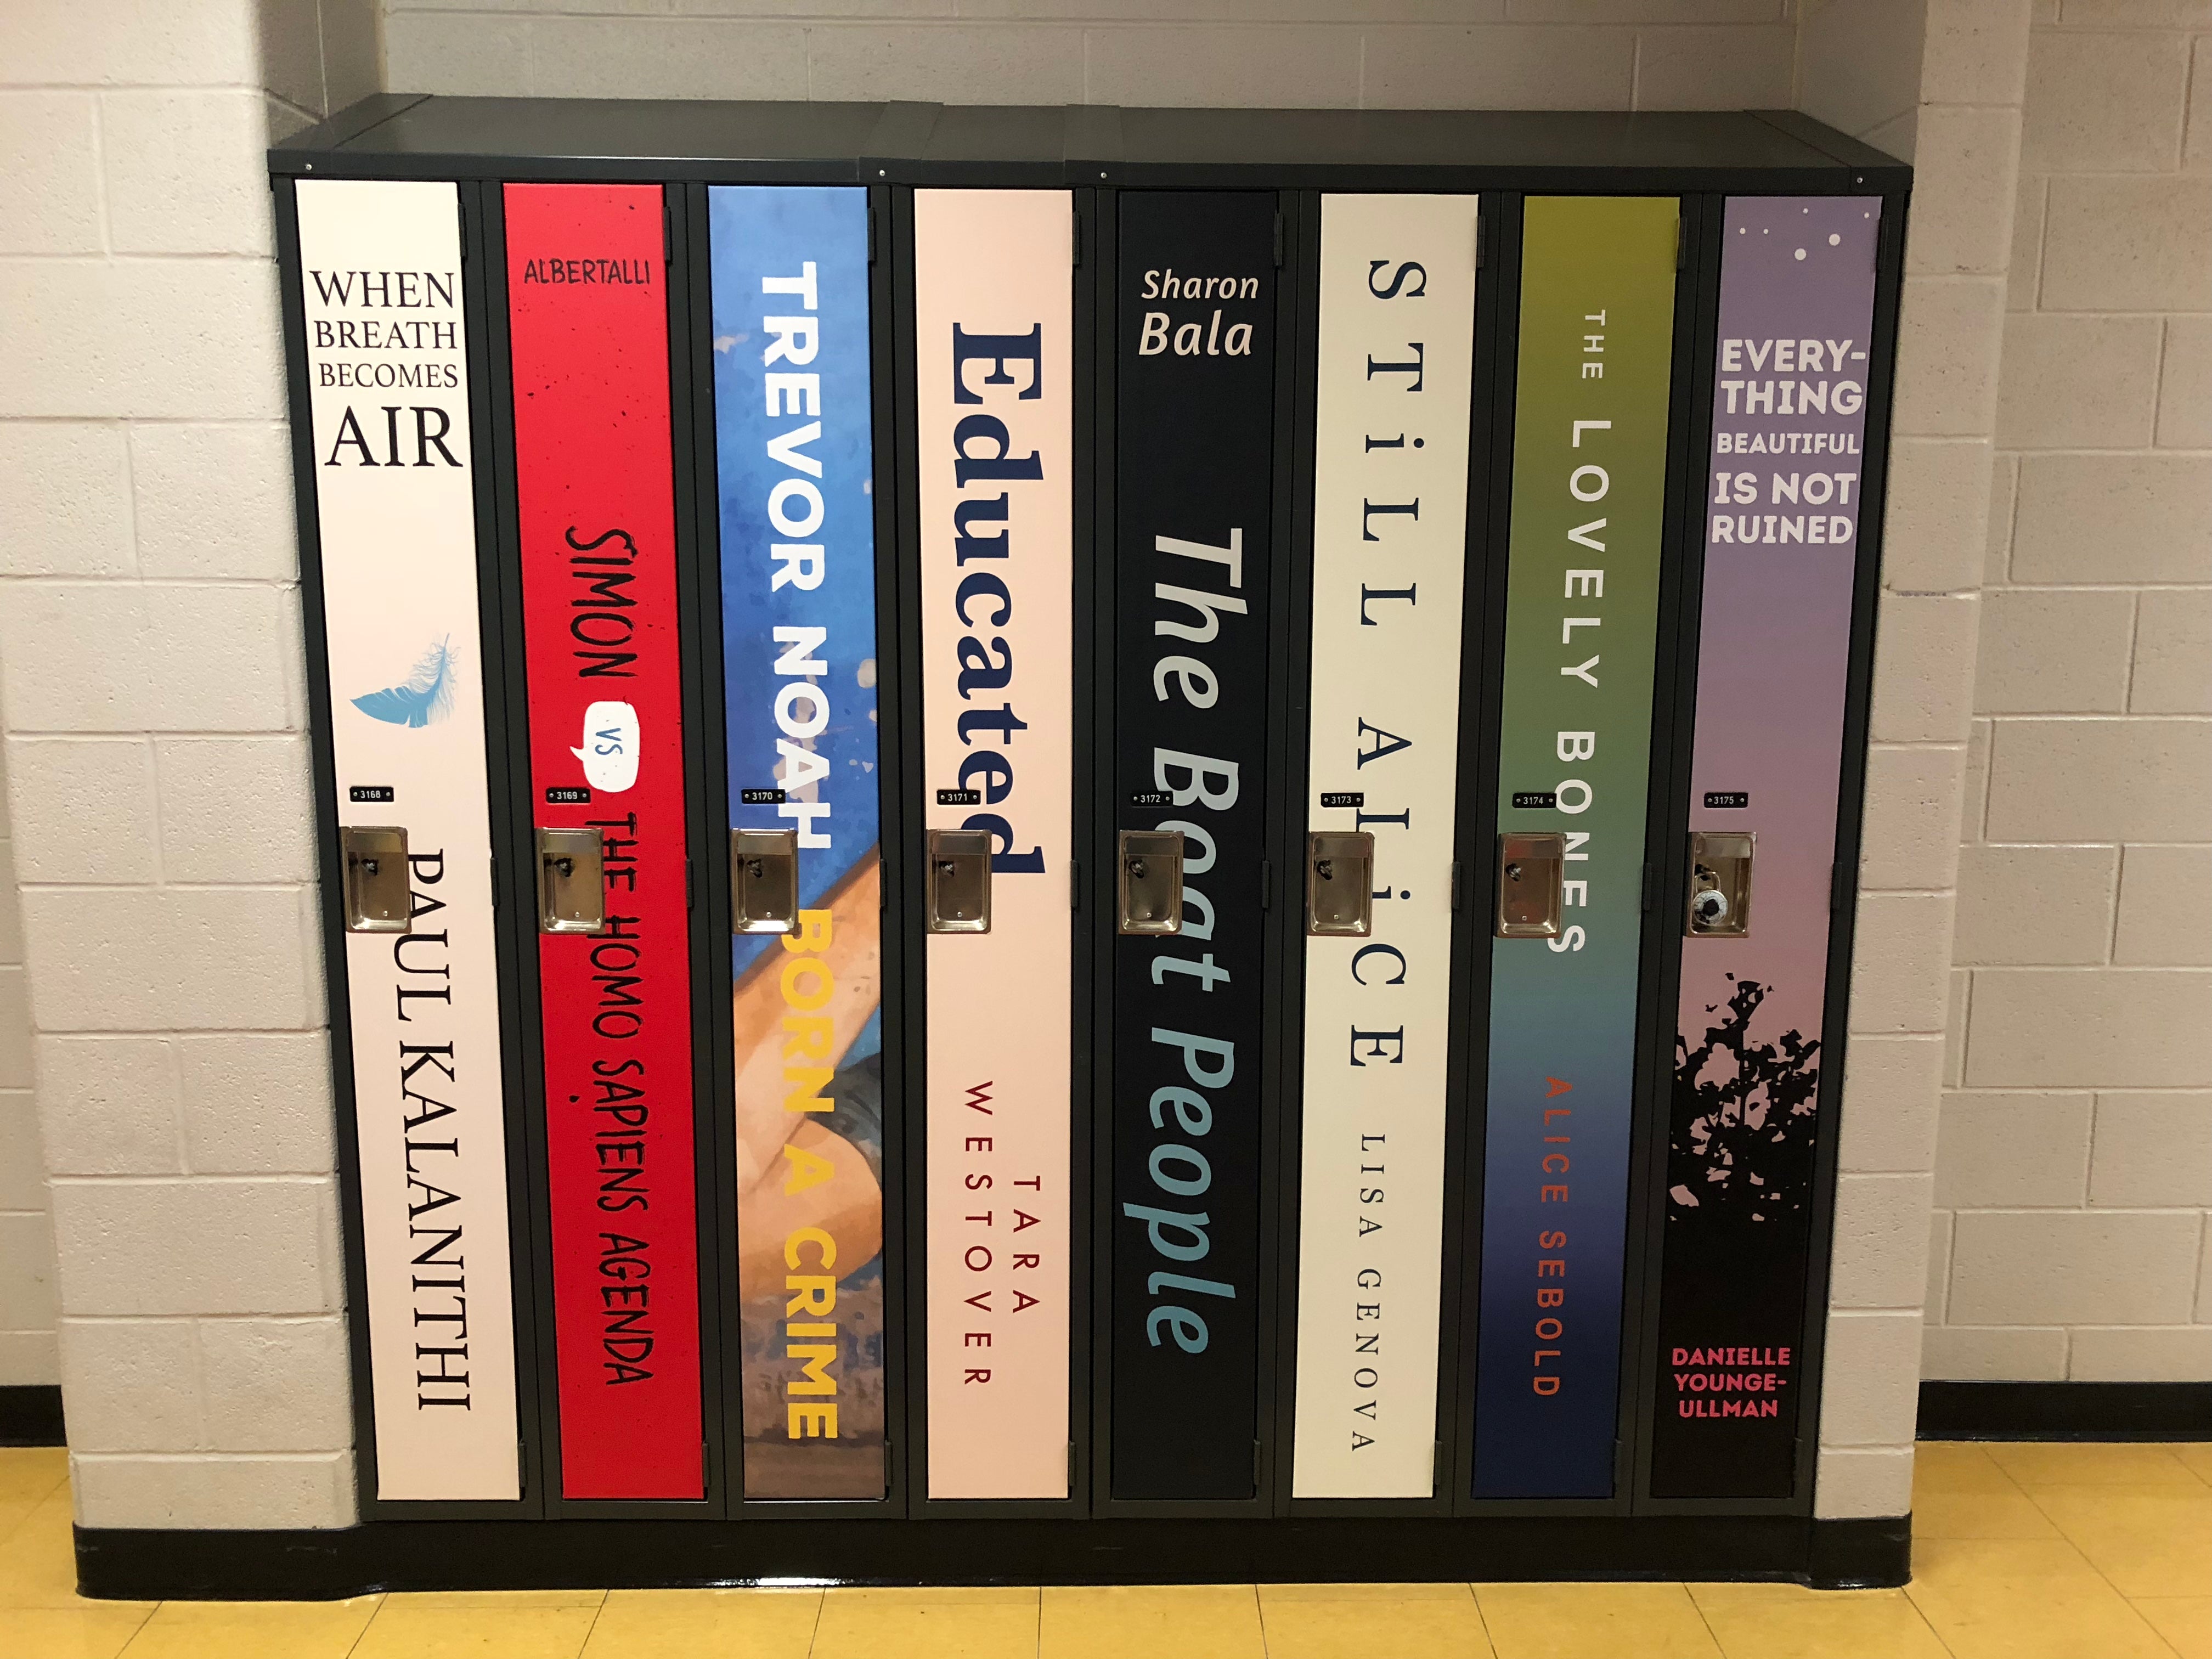
See It in Action
Explore real classroom and hallway installations featuring our custom book spine lockers and literary wall murals. Each project is designed to reflect the school’s curriculum, community, and identity — creating spaces that feel inspiring, educational, and uniquely theirs.

Frequently asked questions
Book Spines
No — our commercial-grade adhesive is designed to remove cleanly when properly installed and removed.
Yes. We can design book spine locker wraps featuring any title or author you choose — including modern bestsellers and contemporary works. Our team professionally recreates stylized spine designs to reflect the look and feel of the book while ensuring a clean, large-scale installation suited for school environments.
Yes — Type II vinyl is fully scrubbable and made for high-traffic environments.
Our commercial-grade Type II vinyl is designed for high-traffic educational environments. With proper installation, book spine locker wraps can last for years while remaining fade-resistant, scrubbable, and durable against daily locker use, cleaning, and student traffic.
Melissa Miller
Looking for help creating a cohesive visual strategy? Mascot and school spirit murals, inspirational quotes and inclusive messaging, design systems for multi-campus districts or specialty programs.